Creating an Event is an effective way to keep community members involved and engaged. 360Alumni communities have a dedicated events section, where both alumni and administrators can create and host local or global events. Follow the steps below to not only create an event, but to also see how that event can be managed and promoted all the way up to the date it takes place.
Community directors know that simply creating an event and then focusing on something else doesn't mean it'll be successful -- promoting the event at strategic times will help maximize the number of members who both sign up and attend.
Note: For reoccurring events, such as annual fundraisers or monthly workshops, it's best to create a new event for each instance, otherwise your attendee list will include from the original event's attendees.
On the top-right navigation menu click "Events," then "Create An Event."

Administrators can mark an event as an "Official Event," which essentially adds a flag/marquee to the event image, dubbing it official.

We recommend keeping the "Title" short, simple and eloquent. Choose a title that is catchy, but specifically defines the event.

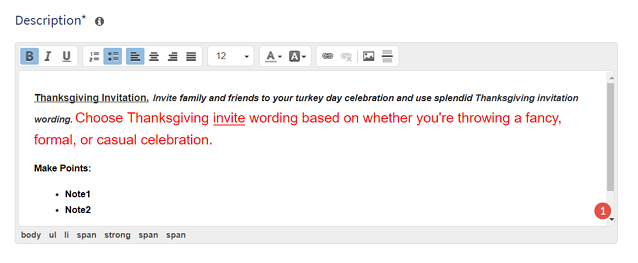
"Description" may include the agenda, details, what to bring, venue information, links to related pages, campaigns, etc. You can also style the text, as shown below.
"Hosted by me" is the selection to click if you are the only host. "Hosted by other user" allows you to add users from the community to collaborate on the event. "Hosted by other entity" may include examples similar to school name, president, dean, and other entities.
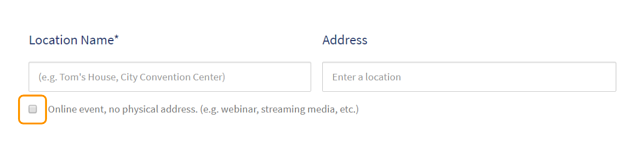
Next, enter the "Location Name" and "Address." If the event does not have a physical address, choose "Online Event". This will discard the location name & address fields.
Next, select the appropriate "Time Zone," and enter "Event Start" and "Event End" times.
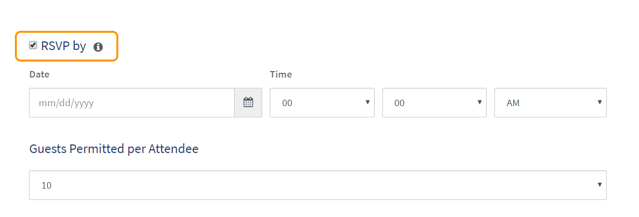
To make members "RSVP by" a particular date and time, chech the box and enter your details. After the deadline, only event administrators can add or remove attendees.
If desired, add a limit to the number of "Guests Permitted per Attendee" or the number of guests that each attendee can register. This setting can be changed in the future.
A "Free Event" automatically creates a free ticket type with unlimited guests. Ticket types can be edited later.

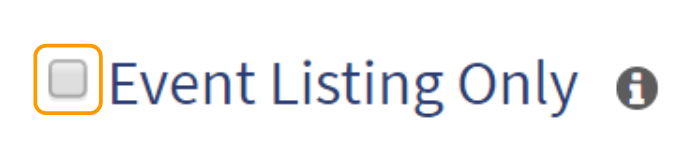
"Event Listing Only" allows you to list an event, but does not allow community members to register. Note that tickets cannot be added to this event once created.
Click on "Save and Continue" to move to the next step.
Media, like images, videos, and websites links, are all supported. It's a good idea to add media that is relevant and eye-catching. Our event page displays a media carousel for a great visual experience.
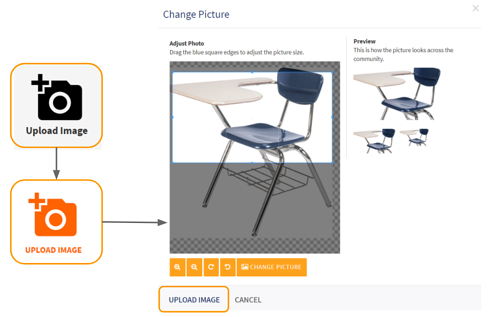
To add an "Image" click the camera thumbnail, then click "Upload Image Icon." Browse for the picture on your computer, select it and click "Upload Image" at the bottom of the window.
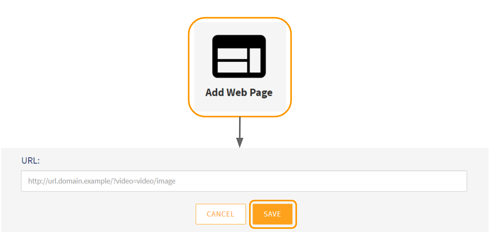
"Video/Image" must be hosted on a video streaming provider like Youtube, Vimeo, or similar. Simply provide the web address of the media file.

Adding "Web Page URL" will ensure that an image of the site displays, along with title and description.
* To add more images repeat the steps and make sure to click save after each upload.
Click on "Save and Continue" to move to the next step.
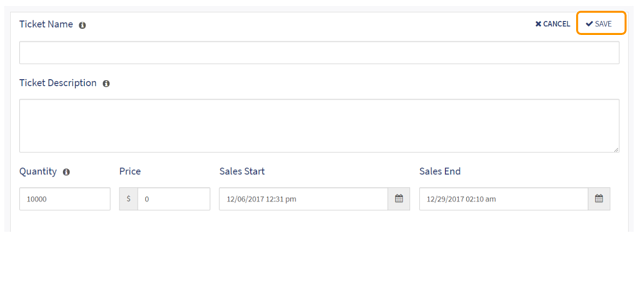
To add tickets, click "Add Ticket Type."

Enter the "Ticket Name," "Ticket Description," "Quantity," "Price," "Sales Start," and "Sales End." Click "Save" when all of your information is in place.
A user can also add "Custom Fields" to event tickets in order to capture guest information, such as dietary restrictions, handicap accessibility, etc.

Click on "Save and Continue" to move to the next step.
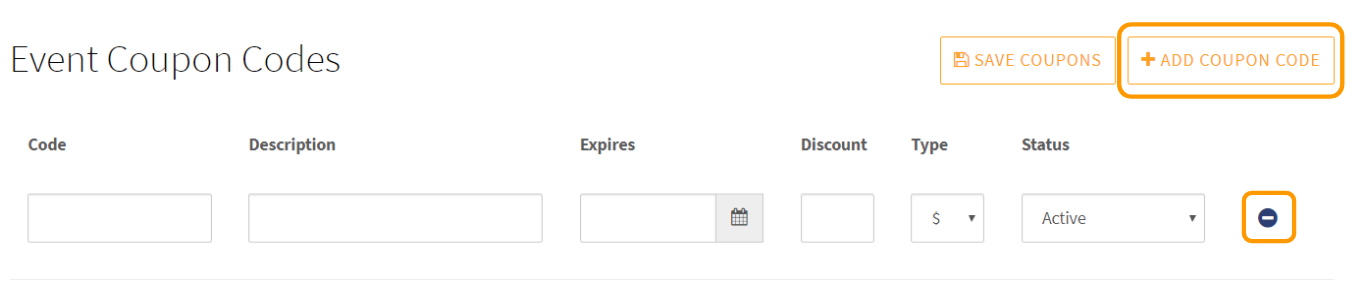
The events feature includes the ability to create a coupon code to offer discounts on tickets. Discounts are applied when the end user enters a code during the checkout process. To create a coupon code, click "Add Coupon." Be sure to click "Save Coupons" when you have completed adding or editing a coupon code.
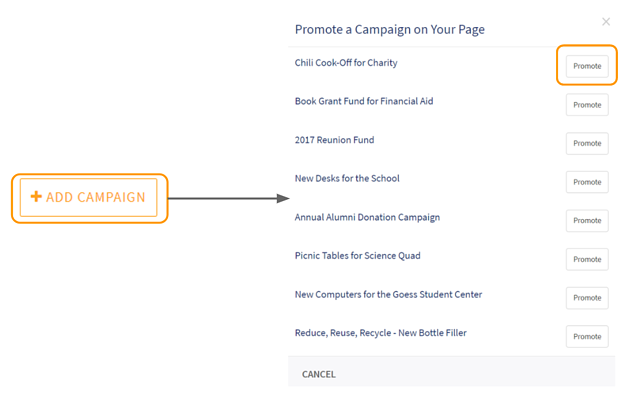
The events page also includes a promotional area that will automatically promote any live fundraising campaigns. If you have multiple campaigns running, you can choose up to two campaigns to promote. If you make no selection, the feature will make a selection from your current live campaigns to promote.
Click "Save & Publish," this will create the event and take you to the promotional page.
Click here to check out an example event page.

.svg)

.webp)